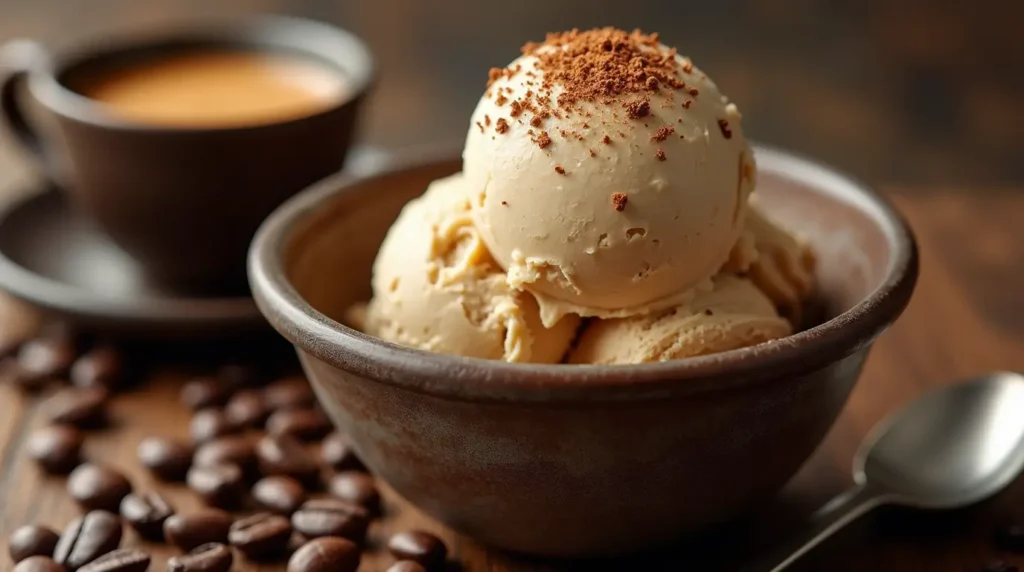
How to Make Creamy Coffee Ice Cream at Home
If you’re a coffee lover with a sweet tooth, coffee ice cream might just be your ultimate dessert. It combines the rich, bold flavor of your favorite brew with the smooth, creamy texture of homemade ice cream — a match made in dessert heaven. Whether you’re cooling off in summer or craving a cozy treat in winter, this frozen favorite offers a café-style indulgence right from your kitchen.
In this post, we’ll show you exactly how to make creamy coffee ice cream at home, with simple ingredients, helpful tips, and two easy methods — one with an ice cream maker, and one without. Get ready to impress your taste buds (and maybe your friends) with every caffeinated scoop!
Table of Contents
Why Coffee Ice Cream Is the Ultimate Homemade Treat
Rich Coffee Flavor Meets Sweet Cream
Coffee ice cream delivers the perfect balance of bold and smooth. By blending strong espresso, instant coffee, or cold brew concentrate with a rich dairy base, you get a dessert that satisfies both coffee cravings and sweet tooths alike. Unlike flavored syrups or artificial mixes, homemade coffee ice cream lets you highlight the true flavor of real coffee beans — whether you prefer deep, roasted notes or light and aromatic brews. Paired with the silky texture of heavy cream and milk, every spoonful feels like a luxurious café-style experience in frozen form.
Better Than Store-Bought – Here’s Why
While store-bought coffee ice creams can be convenient, they often fall short in flavor and texture. Making it at home allows you full control over the ingredients — from choosing premium Arabica coffee to adjusting the sweetness, creaminess, and even caffeine level. Plus, you can skip artificial preservatives and flavorings, resulting in a purer, more decadent scoop. Homemade versions also let you experiment: add espresso shots, mix in crushed cookies, chocolate chunks, or swirl in caramel to make a signature treat that store brands simply can’t replicate.
Perfect for Every Season
Coffee ice cream isn’t just for summer — it’s a year-round dessert with incredible versatility. On a hot day, serve it in a cone or chilled bowl for a refreshing caffeine kick. During cooler months, enjoy it as part of an indulgent affogato (a scoop of coffee ice cream topped with a shot of hot espresso) or alongside a warm brownie. Its rich, roasted flavor profile makes it feel comforting in winter and revitalizing in summer. Whether you’re treating yourself after dinner or serving guests at a gathering, coffee ice cream is always a crowd-pleaser.
Ingredients & Tools You’ll Need
Basic Ingredients for Creamy Coffee Ice Cream
To make truly rich and creamy coffee ice cream at home, you’ll want to use high-quality ingredients that ensure both flavor and texture. Below is a breakdown of the core components used in this recipe:
| Ingredient | Quantity | Notes |
|---|---|---|
| Heavy cream | 2 cups | Essential for that smooth, creamy consistency |
| Whole milk | 1 cup | Balances the richness of the cream |
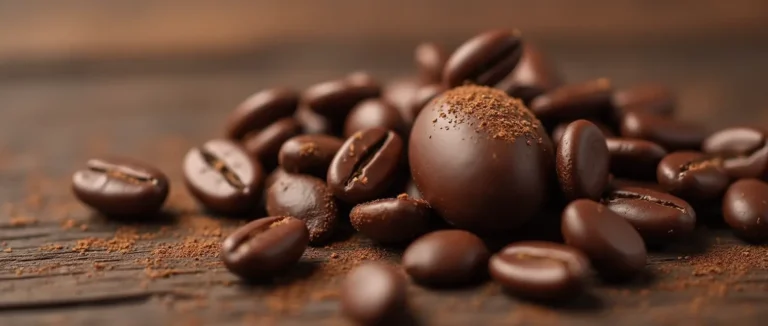
| Instant coffee / espresso | 2 tbsp | Use high-quality instant coffee or strong espresso for bold flavor |
| Egg yolks (optional) | 4 | Adds richness and structure in custard-style recipes |
| Granulated sugar | 3/4 cup | Sweetens the base; adjust to your preference |
| Vanilla extract | 1 tsp | Enhances and rounds out the coffee flavor |
| Salt | Pinch | A small amount brings out all the other flavors |
Note: If you prefer a no-egg or no-cook version, you can skip the yolks and opt for a condensed milk base instead. However, for maximum creaminess and traditional texture, the custard-style method is highly recommended.
Optional Add-ins
Adding mix-ins is a fun way to customize your coffee ice cream and make it truly unique. These optional ingredients can add crunch, sweetness, or extra richness:
- Chocolate chips or fudge swirls – A classic pairing with coffee; adds a smooth and bitter-sweet contrast.
- Crushed cookies or caramel drizzle – For texture and extra decadence; Oreos or shortbread work well.
- Almonds, hazelnuts, or coffee beans – For nutty crunch or a bold roasted finish; chop finely for even distribution.
You can fold in these additions during the last few minutes of churning or mix them gently by hand before freezing.
Tools You’ll Need
Having the right tools makes the ice cream-making process smoother and more enjoyable. While an ice cream maker is ideal for traditional recipes, there are workarounds for no-churn methods as well.
- Ice cream maker (e.g., Cuisinart, KitchenAid): Best for producing smooth, evenly frozen ice cream with minimal effort.
- Mixing bowls: Use medium to large sizes for preparing the base and combining ingredients.
- Whisk or hand mixer: Needed to beat eggs (if used) and to combine ingredients thoroughly.
- Freezer-safe container: Choose an airtight container to store your ice cream and prevent freezer burn.
- Spatula: Great for scraping the bowl clean and folding in mix-ins without deflating the mixture.
Pro Tip: If you’re going the no-churn route, you can use a hand mixer or stand mixer to whip the cream, then freeze the mixture in a loaf pan covered with plastic wrap or parchment paper.
Step-by-Step: How to Make Coffee Ice Cream at Home
Method 1 – Custard-Style (With Egg Yolks)
This traditional method produces the creamiest and most luxurious texture, similar to premium ice cream brands. It does involve cooking but is well worth the effort for a smooth, scoopable result.
- Heat the base mixture
In a saucepan over medium heat, combine the heavy cream, whole milk, granulated sugar, and espresso or instant coffee. Stir continuously until the mixture is hot and steaming but not boiling. This allows the coffee to fully dissolve and infuse into the dairy base. - Temper the egg yolks
In a separate bowl, whisk the egg yolks until smooth. Slowly pour about ½ cup of the hot mixture into the yolks while whisking constantly. This step — called tempering — gradually raises the temperature of the eggs so they don’t scramble. Then, slowly whisk the tempered yolks back into the saucepan. - Cook and thicken the custard
Continue to cook the mixture over medium-low heat, stirring constantly, until it thickens slightly and coats the back of a spoon. Do not let it boil. Remove from heat, stir in the vanilla extract and a pinch of salt, then strain through a fine mesh sieve to ensure a silky texture. - Chill the base thoroughly
Cover and refrigerate the mixture for at least 4 hours, preferably overnight. Once fully chilled, churn it in your ice cream maker according to the manufacturer’s instructions. - Freeze until firm
Transfer the churned ice cream into a freezer-safe container. Freeze for an additional 2–4 hours to firm up before serving.
Method 2 – No-Churn Coffee Ice Cream
Don’t have an ice cream maker? No problem. This no-churn method is quick, easy, and still produces a creamy treat — perfect for beginners or casual dessert lovers.
- Whip the cream
Using a hand mixer or stand mixer, beat the heavy cream on medium-high speed until soft peaks form. This creates the airy base that gives the ice cream its texture without churning. - Combine with sweetened condensed milk and coffee
In a separate bowl, mix sweetened condensed milk with strong instant coffee or espresso concentrate, vanilla extract, and a pinch of salt. Then gently fold this mixture into the whipped cream, being careful not to deflate it. - Freeze the mixture
Pour the finished mixture into a loaf pan or airtight container, smooth the top with a spatula, and cover with plastic wrap or parchment. Freeze for 6–8 hours, or until firm.
Pro Tips for Extra Creaminess
No matter which method you choose, these tips can help you achieve a rich, scoopable texture that rivals store-bought options:
- Use full-fat dairy products
Skimping on fat will result in icy, thin ice cream. Stick with heavy cream and whole milk for the creamiest results. - Don’t skip the chilling step
Whether you’re making custard-style or no-churn, chilling the base completely before freezing ensures smoother texture and better flavor. - Add a splash of alcohol (optional)
Stir in 1 tablespoon of vodka or coffee liqueur to the ice cream base before churning or freezing. Alcohol lowers the freezing point, which helps reduce iciness and keeps your ice cream soft and scoopable.
Conclusion
Making coffee ice cream at home is easier than you might think — and the results are well worth it. Whether you prefer the richness of a custard-style base or the simplicity of a no-churn method, this homemade treat offers a deep, satisfying coffee flavor paired with silky-smooth creaminess. Plus, with total control over ingredients, sweetness, and texture, you can customize every batch to suit your taste.
Ready to skip the store-bought pint? With just a few simple tools and quality ingredients, you can create a coffee ice cream that’s bold, creamy, and better than anything on the shelf. So go ahead — brew that espresso, grab your whisk, and enjoy a scoop (or two) of your new favorite homemade dessert.